
Elevate Your Digital Library: Mastering Custom Domain Bookmarking for Personal Use
This comprehensive guide will empower you to move beyond generic bookmark folders. You’ll discover the immense benefits of owning your digital link space, understand the core components required, and receive step-by-step instructions for setting up your very own branded bookmarking system. Whether you’re a professional curating industry insights, a student organizing research, or simply an individual seeking a more robust way to manage your web finds, mastering custom domain bookmarking offers unparalleled control, professionalism, and future-proofing for your invaluable digital library.
Why Your Personal Bookmarks Deserve a Custom Domain
You might be wondering, “Why go through the effort for personal bookmarks?” The truth is, your digital footprint, even for personal use, benefits immensely from a thoughtful, branded approach. Moving beyond the confines of browser-specific tools or generic bookmarking services offers a multitude of advantages that enhance your productivity, organization, and even your personal brand.
Beyond Browser Bookmarks: Limitations of Native Tools
Think about your current browser bookmarking system. While convenient for quick saves, it often comes with significant drawbacks:
- Browser Lock-in: Your bookmarks are tied to a specific browser. While sync exists, switching browsers or devices can still be clunky.
- Limited Organization: Basic folders and tags don’t always scale well for thousands of links. Advanced search or filtering capabilities are often absent.
- Lack of Portability: If a browser becomes obsolete or you decide to migrate, exporting and importing can be a hassle, sometimes resulting in lost data or broken links.
- No Shareability/Branding: You can’t easily share a curated collection of links under your own name or domain. It’s purely an internal system.
The Power of Personal Branding: Why It Matters Even for Personal Links
Even if you’re not a public figure, a custom domain for your bookmarks projects an image of professionalism and meticulous organization. It demonstrates that you take your digital resources seriously. For instance, imagine sharing a link to a resource with a URL like links.yourname.com/article-title instead of raindrop.io/collection/12345/link/67890. The former is memorable, professional, and reinforces your personal brand.
- Credibility: A custom domain signals authority and attention to detail.
- Memorability: Your custom domain is easier for you and others to remember than a string of characters from a generic service.
- Consistency: It aligns with any other personal branding efforts you might have, such as a personal website or portfolio.
Enhanced Discoverability and Shareability
When you use a custom domain, your curated links become more discoverable, even if primarily for your own use. You can easily direct colleagues, friends, or even future you to yourlinks.com to find what they (or you) need. This is especially powerful if you curate resources for a specific niche or project.
Consider these scenarios:
- You’re often asked for recommendations on productivity apps. Instead of listing them out every time, you can simply say, “Check out my curated tools at
tools.yourdomain.com.” - You’re researching a complex topic. Having all your research links under
research.yourdomain.commakes it easy to revisit and share specific findings with collaborators.
Future-Proofing Your Digital Assets
One of the most compelling reasons for a custom domain is independence. If a bookmarking service you rely on suddenly changes its terms, increases prices, or worse, shuts down, you risk losing access to your meticulously organized links. By using a custom domain, you create a layer of abstraction:
- You can switch underlying bookmarking services without changing your public-facing URL. Simply update your DNS records to point to the new service.
- Your brand (your domain) remains consistent, regardless of the backend provider.
- You maintain ownership and control over your digital identity and resources.
Professionalism and Credibility
For professionals, knowledge workers, and anyone who values their digital organization, a custom domain for bookmarks is a subtle but powerful statement. It transforms a collection of links into a curated, professional resource hub. This isn’t just about aesthetics; it’s about demonstrating a commitment to organization and efficient information management, qualities highly valued in any professional setting.
Understanding the Core Components: What You Need to Get Started
Setting up custom domain bookmarking might sound technical, but it breaks down into a few manageable components. Understanding each piece will demystify the process and give you confidence as you build your personalized link management system.
1. A Custom Domain Name
This is the cornerstone of your personalized setup. A custom domain is your unique address on the internet, like yourname.com or links.yourproject.net. You’ll need to purchase and register one if you don’t already own a suitable domain.
- Where to Buy: Domain registrars like GoDaddy, Namecheap, Google Domains, Cloudflare Registrar, Hover, Gandi.
- What to Consider:
- Relevance: Choose a name that reflects the purpose of your bookmarks (e.g.,
myresources.com,devlinks.net,curated.io). - Memorability: Keep it short, simple, and easy to type.
- Top-Level Domain (TLD): While
.comis popular, consider newer, relevant TLDs like.link,.info,.tech,.io, or even specific country code TLDs (ccTLDs) if applicable. - Privacy: Opt for domain privacy protection to keep your personal information out of public WHOIS databases.
- Relevance: Choose a name that reflects the purpose of your bookmarks (e.g.,
2. A Bookmarking Service or Platform
This is the software that actually stores, organizes, and displays your bookmarks. There are two main categories:
- Cloud-Based Solutions: These are hosted services that handle all the technical infrastructure. You simply connect your custom domain to their platform. They offer convenience but less control.
- Self-Hosted Solutions: These are applications you install on your own web server (e.g., a VPS or shared hosting account). They offer maximum control and privacy but require more technical expertise to set up and maintain.
Your choice here will depend on your technical comfort level, budget, and desired level of control.
3. DNS Management (Domain Name System)
DNS is the internet’s phonebook. It translates human-readable domain names (like bookmarksharer.com) into machine-readable IP addresses (like 192.0.2.1). To connect your custom domain to your bookmarking platform, you’ll need to configure specific DNS records:
- A Record: Maps a domain name (or subdomain) directly to an IP address. Used for root domains (
yourdomain.com) or if your service provides a static IP. - CNAME Record (Canonical Name): Maps a domain name (or subdomain) to another domain name. Often used for subdomains (
links.yourdomain.com) when your bookmarking service provides a specific hostname to point to. - TTL (Time To Live): This setting determines how long DNS resolvers should cache information before querying again. Lower TTLs mean faster propagation of changes but more requests.
You’ll manage these records through your domain registrar’s control panel or a dedicated DNS management service like Cloudflare.
4. SSL Certificate (Secure Sockets Layer)
An SSL certificate encrypts the connection between your users’ browsers and your bookmarking service, ensuring data privacy and security. It’s why you see “HTTPS” in the URL and a padlock icon. It’s absolutely crucial for any website today.
- Why You Need It:
- Security: Protects your data and the privacy of visitors to your bookmarking site.
- Trust: Browsers flag sites without SSL as “Not Secure,” deterring visitors.
- SEO: Search engines favor HTTPS sites.
- How You Get It:
- Many cloud-based bookmarking services include free SSL (often via Let’s Encrypt) automatically when you connect your custom domain.
- If self-hosting, you’ll need to configure SSL manually, typically using Let’s Encrypt (free) or purchasing a certificate. Cloudflare can also provide free universal SSL.
5. Basic Technical Know-How (or Willingness to Learn)
While this guide aims to simplify the process, a basic understanding of web concepts will be helpful. You don’t need to be a developer, but being comfortable navigating web interfaces, understanding terms like “DNS,” and following instructions precisely will make the setup smoother. Most quality bookmarking services and domain registrars offer excellent documentation and support.
Choosing the Right Bookmarking Platform for Your Custom Domain
The core of your custom domain bookmarking setup is the platform itself. Your choice here dictates the features, ease of use, and level of control you’ll have. Consider your priorities: do you prefer convenience, robust features, or complete ownership?
Cloud-Based Solutions (Easy Setup & Maintenance)
These services host your bookmarks and provide an interface for managing them. They often handle SSL and DNS configuration partially, simplifying the process for you. You typically pay a monthly or annual fee for premium features and custom domain support.
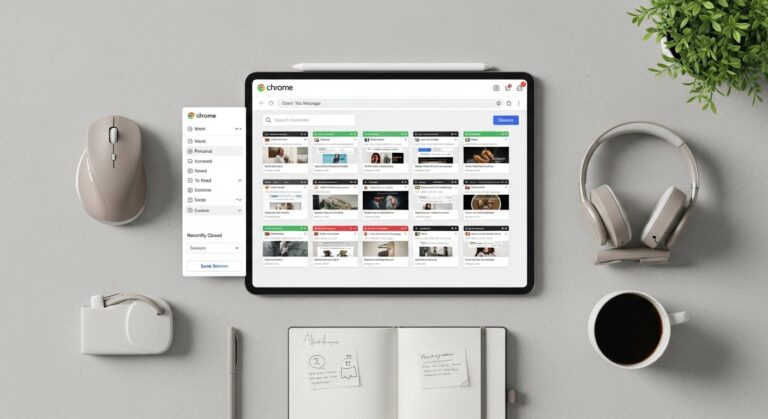
1. Raindrop.io
- Overview: A visually rich, modern bookmark manager that excels at organizing diverse content types (articles, images, videos, files).
- Pricing Tiers:
- Free: Basic features, unlimited bookmarks, 50MB/month uploads.
- Pro ($3/month or $28/year): Custom domain support, nested collections, permanent copies of pages, full-text search, broken link checker, more storage.
- Key Features: Beautiful interface, smart collections, tags, powerful search, screenshot capture, integrations (e.g., Zapier), permanent copies of pages (Pro).
- Custom Domain Setup: Straightforward. In your Raindrop.io Pro settings, you’ll specify your custom domain (e.g.,
links.yourdomain.com). Raindrop.io will provide you with a CNAME record to add to your domain registrar’s DNS settings, pointing to their servers. They handle SSL automatically. - Best For: Visual organizers, those who want a modern interface, and users who prioritize ease of use and rich features without self-hosting.
- Real-World Use Case: A graphic designer curating inspiration boards and resources under
design.yourportfolio.com, easily sharing specific collections with clients or collaborators.
2. Pinboard
- Overview: A “minimalist social bookmarking” service known for its speed, simplicity, and focus on tags. It’s text-heavy, no frills, and incredibly reliable.
- Pricing Tiers:
- Standard ($11/year): Public and private bookmarks, unlimited tags, API access.
- Archival ($25/year): Includes standard features plus permanent archival of all bookmarked pages, ensuring content never disappears.
- Key Features: Fast loading, robust tagging system, full-text search (archival), read-later, link redirection, excellent API for automation.
- Custom Domain Setup: Yes, included in both tiers. You configure a CNAME record at your registrar to point to
pinboard.in. SSL is handled by Pinboard. - Best For: Power users, developers, researchers, and minimalists who value speed, efficiency, and a robust tagging system over visual appeal.
- Real-World Use Case: A software engineer maintaining a private collection of technical articles and documentation under
dev.myname.com, relying on tags for quick retrieval.
3. Wallabag
- Overview: An open-source “read-it-later” application that allows you to save web pages for offline reading, free from distractions. While primarily for reading, it functions as a powerful bookmarking tool.
- Pricing Tiers:
- Self-Hosted: Free (software), requires hosting costs (VPS, shared hosting).
- Hosted Service (wallabag.it): Starts from €9/year for 1 user, up to €49/year for 5 users.
- Key Features: Offline reading, article parsing, tagging, full-text search, RSS feeds, API, mobile apps.
- Custom Domain Setup: Possible with the self-hosted version (requires server configuration) and sometimes offered by the hosted service provider as an add-on. For self-hosted, you’d point your domain to your server’s IP address (A record) and configure your web server (Nginx/Apache) to serve Wallabag.
- Best For: Privacy-conscious users, those who want an open-source solution, and individuals who frequently save long-form content for later, distraction-free reading.
- Real-World Use Case: An academic researcher saving countless papers and articles under
reads.myresearch.orgfor offline annotation and reference.
Self-Hosted Solutions (Maximum Control & Privacy)
These require you to have your own web server (a Virtual Private Server – VPS, or even a Raspberry Pi) and some technical comfort with server administration. The benefit is complete control over your data and software, with no recurring subscription fees for the software itself.
1. LinkAce
- Overview: An open-source, self-hosted bookmark archive with a modern interface, designed to provide full control over your saved links.
- Pricing Tiers: Free (software), requires hosting costs (e.g., a €5/month VPS).
- Key Features: Tags, lists (collections), notes, public/private links, link monitoring (checks for broken links), API, import/export.
- Custom Domain Setup: Yes. You’ll point your domain (A record or CNAME) to your server’s IP address where LinkAce is installed. You’ll then configure your web server (e.g., Nginx or Apache) to serve LinkAce under your custom domain and set up SSL (e.g., using Certbot with Let’s Encrypt).
- Best For: Tech-savvy users, privacy advocates, developers, and those who want full ownership and customization of their bookmarking system.
- Real-World Use Case: A content creator building a comprehensive, searchable archive of resources for their niche audience under
resources.mybrand.com, with full control over data and presentation.
2. Shaarli
- Overview: A minimalist, open-source personal bookmarking service written in PHP. It’s incredibly lightweight, fast, and easy to deploy.
- Pricing Tiers: Free (software), requires hosting costs.
- Key Features: Tags, public/private links, RSS feeds, simple interface, “daily digest” feature.
- Custom Domain Setup: Similar to LinkAce. Point your domain to your server and configure your web server to serve Shaarli. SSL will need to be configured on your server.
- Best For: Minimalists, users who prefer a very simple, fast interface, and those comfortable with basic server setup for a PHP application.
- Real-World Use Case: A developer maintaining a quick-access list of code snippets and tools under
snippets.mydomain.dev, valuing speed and simplicity.
Key Considerations for Your Choice:
- Features vs. Simplicity: Do you need rich visuals and full-text search, or is a simple tag-based system sufficient?
- Cost: Cloud services have recurring fees; self-hosting has initial setup and ongoing server costs.
- Technical Comfort: Are you comfortable with DNS records and server configurations, or do you prefer a “set it and forget it” solution?
- Data Ownership & Privacy: How important is it for you to have complete control over your data?
- Scalability: How many links do you anticipate saving? Will the service handle future growth?
- Community & Support: Is there active development and a supportive community for troubleshooting?
Step-by-Step Guide: Setting Up Your Custom Domain Bookmarking
Now that you understand the components and have considered your platform choice, let’s walk through the practical steps to get your custom domain bookmarking system up and running. Follow these instructions carefully, adapting them to your chosen service and domain registrar.
Step 1: Acquire Your Domain Name
If you don’t already have a domain, this is your first stop.
- Choose a Registrar: Popular choices include Namecheap, GoDaddy, Google Domains, Cloudflare Registrar, or Hover. Compare pricing, included features (like domain privacy), and ease of use.
- Search for Your Desired Domain: Enter potential domain names (e.g.,
my.links,curated.io,resources.yourname.com). Consider subdomains as well if you have an existing domain (e.g.,links.yourmainwebsite.com). - Purchase and Register: Follow the registrar’s process to complete the purchase. Ensure you enable domain privacy protection.
Step 2: Select Your Bookmarking Platform
Based on the previous section, finalize your choice. For this guide, we’ll assume a cloud-based service like Raindrop.io or Pinboard for simplicity in DNS setup, but the principles apply to self-hosted solutions as well.
- Sign Up/Install: Create an account with your chosen cloud service (e.g., Raindrop.io Pro) or install the self-hosted software on your server (e.g., LinkAce).
- Familiarize Yourself: Spend some time exploring the platform’s interface and basic bookmarking functions.
Step 3: Configure DNS Records
This is the most crucial technical step. You’ll need to access your domain registrar’s DNS management interface.
- Log in to Your Domain Registrar: Access the control panel where you manage your domain names (e.g., Namecheap dashboard, GoDaddy “My Domains”).
- Navigate to DNS Settings: Look for sections like “DNS Management,” “Advanced DNS,” “Zone File,” or “Nameservers.”
- Identify Required Records from Your Bookmarking Platform:
- For Cloud-Based Services (most common): Your chosen platform (e.g., Raindrop.io, Pinboard) will typically provide you with a CNAME record to add. It will look something like:
- Type: CNAME
- Host/Name:
links(if you wantlinks.yourdomain.com) or@(if you wantyourdomain.com, though CNAMEs for root domains can be tricky/require flattening). - Value/Target: The hostname provided by your service (e.g.,
custom.raindrop.ioorpinboard.in). - TTL: Leave as default or set to 300-600 seconds (5-10 minutes) for faster propagation.
- For Self-Hosted Solutions: You’ll usually need an A record pointing to your server’s IP address:
- Type: A
- Host/Name:
linksor@ - Value/Target: Your server’s public IP address (e.g.,
192.0.2.100). - TTL: Default or 300-600 seconds.
- For Cloud-Based Services (most common): Your chosen platform (e.g., Raindrop.io, Pinboard) will typically provide you with a CNAME record to add. It will look something like:
- Add the DNS Record: Create the new record exactly as specified by your bookmarking platform or for your self-hosted server. Ensure there are no conflicting records (e.g., if you’re using
links.yourdomain.com, make sure no other CNAME or A record exists forlinks). - Save Changes: Confirm and save your DNS settings.
Note on Propagation: DNS changes are not instant. It can take anywhere from a few minutes to 48 hours for changes to propagate across the internet. You can use tools like whatsmydns.net to check propagation progress.
Step 4: Platform-Specific Custom Domain Setup
After configuring DNS, you need to tell your bookmarking platform about your custom domain.
- Access Custom Domain Settings: In your bookmarking service’s dashboard (e.g., Raindrop.io Pro settings, Pinboard settings), locate the “Custom Domain” or “Domain Mapping” section.
- Enter Your Domain: Input the exact domain or subdomain you configured in DNS (e.g.,
links.yourdomain.com). - Follow Verification Steps: Some services might require a verification step, such as adding a TXT record to your DNS to prove domain ownership. Follow their specific instructions.
- Save and Activate: Save your settings within the platform.
Step 5: Implement SSL/TLS
Ensuring your site is secure with HTTPS is non-negotiable.
- Cloud-Based Services: Most premium cloud services (like Raindrop.io, Pinboard) will automatically provision and manage an SSL certificate for your custom domain once the DNS is correctly pointed and verified. This might take some time after the domain setup.
- Self-Hosted Solutions: You’ll need to configure SSL on your web server. The most common and recommended method is using Certbot with Let’s Encrypt, which provides free, automated SSL certificates.
- Install Certbot on your server.
- Run Certbot to request a certificate for your domain (e.g.,
sudo certbot --nginx