
Unlock Peak Productivity with the PARA Method: Your Guide to Digital Organization and Knowledge Management
Affiliate disclosure: This article may contain affiliate links. Recommendations are independent and editorially driven.
In an increasingly digital world, the sheer volume of information we encounter daily can feel overwhelming. From countless browser tabs and saved articles to an ever-growing list of tasks and projects, managing our digital lives effectively is no longer a luxury—it’s a necessity. This is especially true for anyone serious about personal knowledge management (PKM), productivity, and efficient link curation.
Enter the PARA method, a revolutionary organizational system developed by productivity expert Tiago Forte. PARA stands for Projects, Areas, Resources, and Archives, and it provides a universal framework for organizing any kind of information, across any platform. Whether you’re managing bookmarks, taking notes, organizing files, or planning your next big project, PARA offers a clear, consistent structure that reduces mental clutter and enhances focus.
For users of bookmark managers, note-taking apps, browser extensions, and other PKM tools, the PARA method isn’t just another organizational fad; it’s a foundational strategy that can transform how you interact with and leverage your digital knowledge. This comprehensive guide will deep-dive into the PARA method, exploring its components, benefits, implementation strategies, and how it integrates seamlessly with your favorite digital tools to elevate your productivity and knowledge management to new heights.
What is the PARA Method? A Universal System for Digital Organization
At its core, the PARA method is a simple yet powerful system for organizing all the information in your life. It’s designed to be universal, meaning it applies consistently whether you’re organizing files on your computer, notes in a digital notebook, tasks in a project manager, or links in a bookmarking tool. The beauty of PARA lies in its four straightforward categories, each serving a distinct purpose:
- P – Projects: A series of tasks linked to a goal, with a deadline.
- A – Areas: A sphere of activity with a standard to be maintained over time.
- R – Resources: A topic or theme of ongoing interest.
- A – Archives: Inactive items from Projects, Areas, or Resources.
This structure provides clarity on where every piece of information should reside, reducing the friction of decision-making and ensuring that your digital environment supports, rather than hinders, your work and life goals. By understanding the purpose of each category, you can confidently sort, retrieve, and act upon your information.
The Foundational Principles of PARA
The PARA method isn’t just about creating folders; it’s about a dynamic flow of information that mirrors how you work and learn. It’s designed to be action-oriented, ensuring that your knowledge is not merely stored but actively leveraged. Here are some of its foundational principles:
- Actionability: Information is categorized based on its immediate relevance to your current goals and responsibilities. Projects are where action happens.
- Context: Each item has a clear home, providing context for its existence and purpose. This prevents information from becoming an isolated data point.
- Flexibility: The system is robust enough to handle any type of information (text, links, images, documents) and adaptable to any digital tool.
- Simplicity: Despite its power, the four categories are easy to remember and apply, reducing cognitive load when organizing.
- Flow: Information is expected to move between categories over time. A Resource might become relevant to a Project, or a finished Project might be moved to Archives.
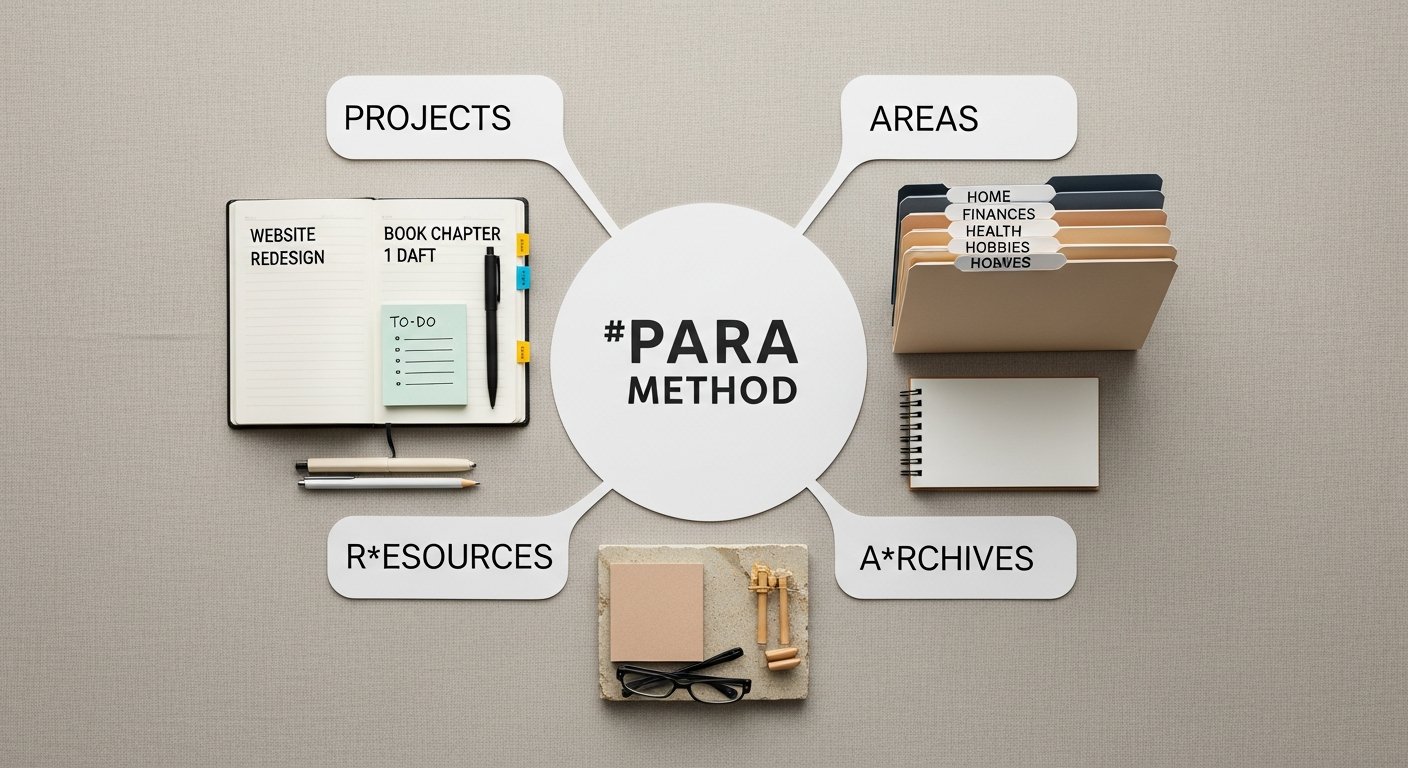
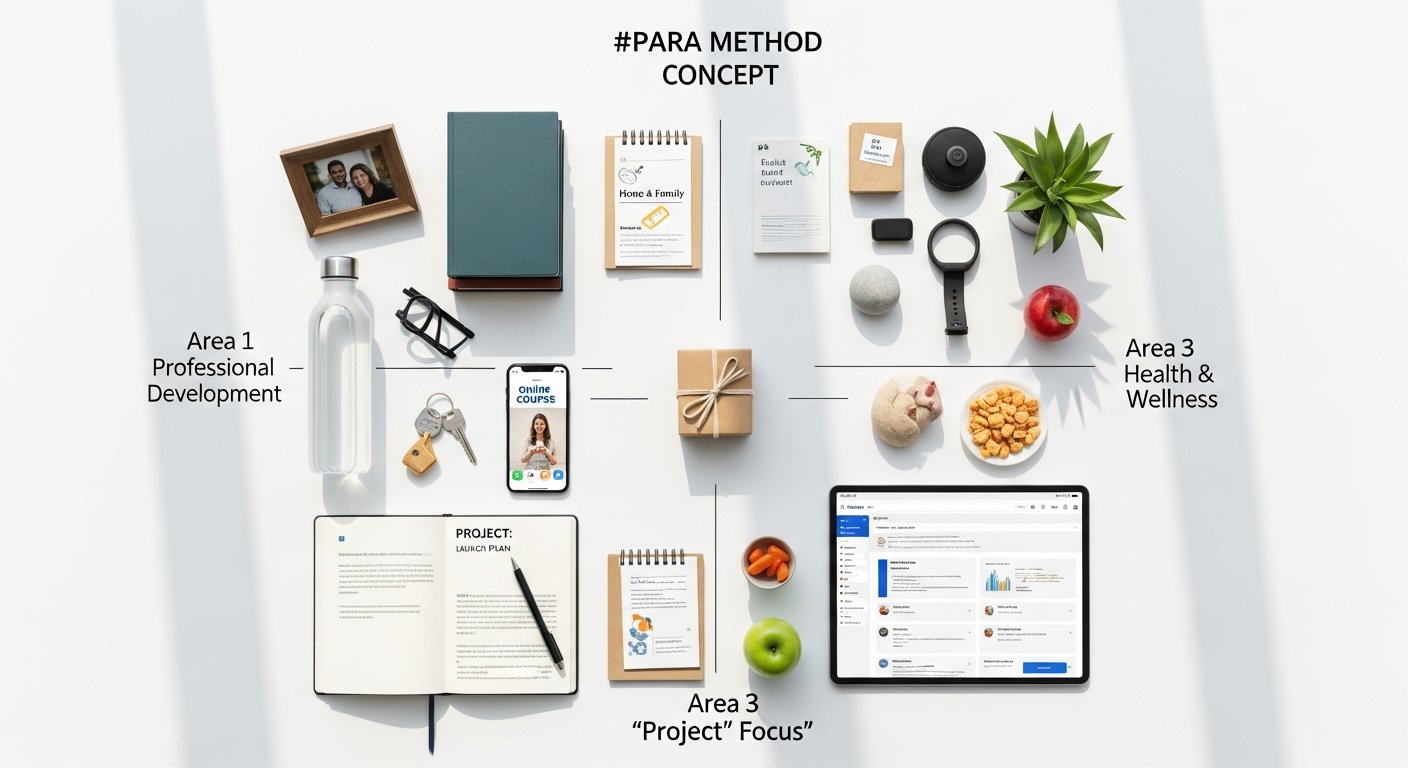
[INLINE IMAGE 1: place after second H2 | alt=”para method concept illustration”]
Why Implement the PARA Method? Benefits for Productivity and Knowledge Management
Adopting the PARA method is more than just organizing your files; it’s a strategic move that can dramatically enhance your productivity, reduce stress, and transform your relationship with information. For anyone deeply invested in tech productivity and effective knowledge management, the benefits are profound and far-reaching.
Clarity and Focus in a World of Digital Noise
One of the most immediate benefits of PARA is the unparalleled clarity it brings to your digital life. Instead of a sprawling mess of unfiled documents, random notes, and unsorted bookmarks, you gain a structured, predictable system. This clarity translates directly into:
- Reduced Cognitive Load: You spend less mental energy trying to remember where something is or what it relates to. Each piece of information has a “home,” making retrieval effortless.
- Enhanced Decision-Making: With clear categories for Projects and Areas, it becomes easier to decide what to work on next, what information is most relevant, and where new information should be stored. This prevents analysis paralysis.
- Improved Focus: By segmenting your digital space, you can dedicate specific environments to specific types of work. When you’re in your “Projects” section, you’re in execution mode. When you’re in “Resources,” you’re in learning/curation mode. This focused environment minimizes distractions.
Efficient Information Retrieval and Application
The true power of knowledge lies not just in its acquisition but in its ability to be recalled and applied when needed. PARA excels at this:
- Rapid Retrieval: Whether you need a specific file for a project, a note related to an ongoing area of responsibility, or a resource for future learning, the logical structure of PARA allows you to find it quickly. This saves invaluable time that would otherwise be lost to searching.
- Actionable Knowledge: By linking information directly to Projects and Areas, PARA ensures that your saved knowledge isn’t just theoretical; it’s primed for action. Bookmarks saved for a “Project: Marketing Strategy” are immediately relevant and ready to be used.
- Seamless Integration Across Tools: The universal nature of PARA means you can apply the same organizational logic to your bookmark manager, note-taking app, file storage, and task list. This creates a cohesive digital ecosystem where information flows smoothly between different tools, rather than being siloed.
Reduced Stress and Digital Overwhelm
The feeling of being overwhelmed by digital clutter is a common modern ailment. PARA offers a powerful antidote:
- Systematic Decluttering: The “Archives” category provides a guilt-free space for finished projects and less active resources. You don’t delete information; you simply move it out of your active workspace, knowing it’s there if you ever need it. This prevents digital hoarding.
- Clear Boundaries: PARA helps differentiate between “active work” (Projects), “ongoing responsibilities” (Areas), and “potential future interest” (Resources). This distinction reduces the mental burden of feeling like everything is equally urgent or important.
- Empowerment Over Your Digital Life: By implementing PARA, you take control of your information, rather than being controlled by it. This sense of mastery over your digital environment is incredibly empowering and reduces anxiety related to lost files or forgotten tasks.
In essence, the PARA method provides a robust framework that empowers you to not only manage information but to truly leverage it for greater productivity, learning, and peace of mind. It transforms your digital chaos into a structured, responsive knowledge base.
The Pillars of PARA: Understanding Each Component in Detail
To effectively harness the power of the PARA method, it’s essential to understand each of its four components deeply. Each category serves a unique purpose and plays a critical role in the overall system, guiding where your digital assets – from bookmarks and notes to files and tasks – should reside.
Projects: The Heartbeat of Action and Progress
Definition: A Project is a series of tasks, linked to a specific goal, with a deadline. Projects are the “active ingredient” in the PARA method; they represent the things you are actively working on right now. They have a clear start and a clear end.
- Key Characteristics:
- Action-Oriented: Projects demand action and have clear next steps.
- Time-Bound: There’s usually a specific completion date or timeframe.
- Outcome-Driven: Projects aim to achieve a tangible result or outcome.
- Temporary: Once completed, a project either moves to Archives or transforms into a new project/area.
- Examples for bookmarksharer users:
- “Launch New Website Feature (Q3 2026)”
- “Research Competitor Analysis Tools” (Goal: Select a tool by month’s end)
- “Curate Links for ‘Future of AI’ Presentation”
- “Write Blog Post: ‘Top 10 Productivity Hacks 2026′”
- “Plan Summer Vacation 2026”
- What goes here: All information directly related to achieving a project’s goal. This includes project plans, research notes, meeting minutes, relevant bookmarks, drafts, asset files, and communication logs. In a bookmark manager, this might be a specific collection or tag for “Website Feature Launch Links.”
Areas: Spheres of Ongoing Responsibility and Maintenance
Definition: An Area of Responsibility is a sphere of activity with a standard to be maintained over time. Unlike Projects, Areas are ongoing and generally don’t have a specific end date. They represent aspects of your life or work that require continuous attention and maintenance.
- Key Characteristics:
- Ongoing: Areas are never “finished”; they require continuous engagement.
- Standard-Driven: There’s an expectation of maintaining a certain level or quality within this area.
- Passive (often): While projects are active, areas are more about managing a domain. Tasks may arise from an Area, forming a new Project.
- Permanent: Areas typically persist over long periods.
- Examples for bookmarksharer users:
- “Personal Development” (e.g., learning new skills, reading books, self-improvement)
- “Health & Fitness” (e.g., workout plans, diet research, medical records)
- “Finances” (e.g., budgeting, investments, tax documents)
- “Professional Growth” (e.g., industry news, certification tracking, skill development)
- “Website Maintenance” (e.g., backups, security updates, performance monitoring)
- “Family Life” (e.g., family calendar, kids’ activities, home management)
- What goes here: Reference materials, long-term plans, policies, standards, templates, and general knowledge related to that area. For bookmarksharer, this could be a “Professional Growth: Industry Trends” collection, or tags like “Health_Nutrition_Recipes.”
Resources: Your Repository of Interests and Potential
Definition: A Resource is a topic or theme of ongoing interest. Resources are anything that captures your attention or curiosity, but isn’t directly tied to an active project or an ongoing area of responsibility right now. They are potential fuel for future projects or knowledge that enriches your understanding.
- Key Characteristics:
- Topical: Organized by subject matter, themes, or interests.
- Exploratory: Information gathered out of curiosity or for potential future use.
- No Deadline: There’s no immediate pressure to act on this information.
- Cross-cutting: A resource might eventually inform multiple projects or areas.
- Examples for bookmarksharer users:
- “AI Ethics & Future Trends” (Saved articles, research papers, thought pieces)
- “Web Design Best Practices” (Tutorials, inspiring portfolios, CSS tips)
- “Digital Marketing Strategies” (e-books, blog posts, case studies)
- “Sustainable Living Ideas” (DIY guides, product reviews, research)
- “Cooking Recipes & Techniques”
- “Interesting Quotes and Ideas”
- What goes here: Any information you want to keep for future reference or learning, organized by topic. This is where bookmarking tools truly shine. You might have folders or tags like “AI_Trends,” “Design_Inspiration,” or “Cooking_Vegan.” These are often where new Projects or insights originate.
Archives: Your Digital History and Cold Storage
Definition: An Archive is for inactive items from Projects, Areas, or Resources. Once a project is completed, an area becomes inactive (e.g., a past job), or a resource is no longer a current interest, it moves to the Archive. This acts as a historical record and a decluttering mechanism for your active spaces.
- Key Characteristics:
- Inactive: Items are no longer being actively worked on or maintained.
- Historical Record: Provides a reference for past work, decisions, or interests.
- Storage Only: No expectation of immediate action or retrieval.
- Permanent (usually): Information is retained indefinitely, unless explicitly deleted.
- Examples for bookmarksharer users:
- “Archived Project: Old Website Redesign 2024” (All related files, notes, bookmarks)
- “Archived Area: Old Job Role” (Related documents, professional development notes)
- “Archived Resource: Outdated Technology Trends” (Articles, tutorials that are no longer relevant)
- “Completed Course Materials: Online Marketing 101”
- What goes here: Everything that has run its course but you might need to reference in the future. The Archive ensures that your active Projects, Areas, and Resources remain lean and focused, while providing a safety net for valuable historical data. In your bookmark manager, this might be an “Archives” folder with subfolders for old projects or categories.
Understanding these four components and their dynamic relationship is the key to mastering the PARA method. They provide a robust framework that brings order to the complex world of digital information.
Implementing PARA Across Your Digital Toolkit
The true genius of the PARA method lies in its universality. It’s not tied to a specific app or platform, but rather provides a mental model that you can apply consistently across all your digital tools. This is particularly powerful for users of bookmark managers, note-taking apps, and other PKM tools who often juggle information across multiple platforms.
Bookmark Managers & Link Curation: Organizing Your Web Knowledge
For bookmarksharer users, applying PARA to your link curation workflow is a game-changer. Instead of a messy collection of uncategorized links or a rigid folder structure that quickly becomes obsolete, PARA offers a dynamic and actionable system.
- Projects (Bookmarks): Create specific collections, tags, or folders for each active project. For example, a collection named “Project: Website UI Redesign” would house all articles on modern UI trends, competitor analyses, and design inspiration relevant to that specific project. Once the project is complete, move this collection to your “Archives” section.
- Areas (Bookmarks): Use tags or collections for your ongoing responsibilities. Examples: “Area: Personal Finance” might contain links to budgeting tools, investment articles, and tax resources. “Area: Professional Development” could hold links to courses, industry reports, and career advice. These are continually updated and maintained.
- Resources (Bookmarks): This is where the bulk of your curated links might reside. Create broad categories for your interests: “Resource: AI & Machine Learning,” “Resource: Productivity Hacks,” “Resource: Healthy Recipes.” These are topics you’re curious about and want to learn more about, potentially feeding future projects or simply expanding your knowledge base. Many bookmark managers allow robust tagging, which is ideal here for cross-referencing.
- Archives (Bookmarks): Create an “Archives” top-level folder or tag. Within it, move completed project collections (e.g., “Archived Project: Old Marketing Campaign”), inactive Area collections (e.g., “Archived Area: Previous Job Role”), or Resource collections you no longer actively pursue (e.g., “Archived Resource: Flash Development Tutorials”).
Many modern bookmarking tools offer features like nested folders, tags, and collections that perfectly align with the PARA structure. The key is to be consistent with your naming conventions (e.g., always prefix “Project:” or “Area:” to your collections).
Note-Taking Apps: Structuring Your Thoughts and Learning
Tools like Notion, Evernote, Obsidian, and OneNote become far more powerful when organized with PARA. This approach ensures your notes are not just stored but are readily accessible and actionable.
- Notion: Utilize databases for “Projects” (with status, due dates), pages for “Areas,” and dedicated “Resources” databases for articles, books, and insights. A top-level “Archives” page can house old projects/notes.
- Evernote: Create separate notebooks for each Project, Area, and Resource. A “Project: New App Launch Notes” notebook would be active, while “Area: Health Journal” would be ongoing. “Resource: Design Principles” would contain general knowledge. Once a notebook is finished or inactive, move it to an “Archives” stack.
- Obsidian: Leverage folders and tags. Create top-level folders: “Projects,” “Areas,” “Resources,” “Archives.” Within these, create subfolders or use tags to further categorize. For example,
Projects/Blog Post Ideas/2026-05_PARA_ArticleorResources/AI/Latest Research Papers. Links between notes reinforce the interconnectedness. - OneNote: Use Sections or Section Groups for Projects, Areas, and Resources within your notebooks. An “Archives” notebook can hold inactive sections.
The crucial aspect is consistency. Choose your tool, establish your PARA structure, and stick to it. This allows for seamless movement of information between categories as its relevance changes.
File Management & Cloud Storage: Organizing Your Digital Assets
Your local hard drives and cloud storage services (Google Drive, Dropbox, OneDrive, iCloud) are prime candidates for PARA implementation. This brings order to your documents, photos, and media.
- Top-Level Folders: Create the four main folders: “Projects,” “Areas,” “Resources,” “Archives.”
- Within Projects: Each active project gets its own subfolder (e.g.,
Projects/Client X Website Redesign). This folder contains all files related to that project: documents, images, spreadsheets, presentations. - Within Areas: Subfolders for each area of responsibility (e.g.,
Areas/Personal Finance,Areas/Health & Fitness,Areas/Home Management). - Within Resources: Subfolders for topics of interest (e.g.,
Resources/Photography Techniques,Resources/AI Research Papers,Resources/Learning Spanish). - Within Archives: Move completed project folders, inactive area folders, or outdated resource folders here (e.g.,
Archives/Old Projects/Project Y Completed 2025).
This systematic approach ensures that whether you’re looking for a specific invoice, a presentation deck, or a family photo, you know exactly where to find it. The mental overhead of searching is dramatically reduced.
Task Managers: Connecting Actions to Your PARA Structure
While PARA is fundamentally about information organization, it has a direct impact on how you manage your tasks. Many task managers (Todoist, Asana, ClickUp) allow you to create projects, and these can directly map to your PARA “Projects.”
- Projects in Task Managers: Create a project in your task manager for each active “Project” in your PARA system. All tasks for “Project: Website UI Redesign” go into its dedicated project list.
- Areas in Task Managers: For recurring tasks related to an Area (e.g., “Review Finances Weekly” for “Area: Personal Finance”), these can be set up as recurring tasks or within a dedicated “Area” project list in your task manager. Some people prefer to keep Area tasks in a general “Admin” or “Maintenance” project in their task manager, linking them back to the relevant Area in their note-taking system.
- Resources: Resources don’t typically generate direct tasks, but they might inspire a new Project. (e.g., Reading a “Resource: Productivity Hacks” article might lead to a new “Project: Implement Eisenhower Matrix”).
The key is to use your task manager for “what to do,” and your PARA-organized information system for “the information needed to do it.”
Discover more about integrating your bookmark manager with other productivity tools.
Practical Steps to Get Started with the PARA Method
Implementing a new organizational system can seem daunting, but the PARA method is designed for incremental adoption. Here’s a step-by-step guide to help you begin transforming your digital landscape.
Step 1: The Initial Brain Dump and Inventory
Before you can organize, you need to know what you have. This first step is about getting everything out of your head and into a visible, manageable format.
- List Everything: Take a notebook or a simple text document and list every active project you’re working on, every area of responsibility you maintain, every topic you’re interested in, and even old projects/information you’re holding onto. Don’t censor yourself; just get it all down.
- Gather Your Digital Clutter: Open your bookmark manager, your note-taking app, your cloud storage, and your desktop. Take a mental inventory (or even a quick screenshot) of the sheer volume of unsorted items, random folders, and unread articles. This awareness is the first step to change.
Step 2: Define Your Projects, Areas, and Resources
Now, it’s time to apply the PARA definitions to your inventory from Step 1.
- Identify Projects: Look at your list. Which items have a clear goal and a deadline? These are your Projects. Be specific (e.g., “Launch New Product V2.0,” “Complete Annual Performance Review,” “Organize Digital Photo Archive”). Aim for 5-15 active projects at any given time.
- Define Your Areas: Next, identify your ongoing responsibilities. These are the spheres of your life or work that require continuous attention but don’t have an endpoint. Think “Health,” “Finances,” “Professional Development,” “Home,” “Relationships,” “Creative Pursuits.” Keep this list manageable, perhaps 5-12 core areas.
- Categorize Resources: What topics are you interested in? What do you want to learn more about? What information might be useful someday? Group these into broad categories. Examples: “AI & Future Tech,” “Cooking & Nutrition,” “Marketing Strategies,” “Philosophy,” “Travel Destinations.” These are your Resources. Don’t worry about being exhaustive; you’ll add more over time.
- Everything Else is Archive (for now): If an item doesn’t fit into an active Project, a defined Area, or a current Resource topic, it’s a strong candidate for the Archive. Don’t delete it; just acknowledge its inactive status.
Step 3: Choose Your Tools and Establish the Structure
You don’t need new tools to start with PARA; use what you already have. The key is to apply the PARA structure consistently within them.
- Select Your Core Tools: Which bookmark manager, note-taking app, and file storage do you use most often?
- Create Top-Level PARA Categories: In each selected tool, create the four top-level categories:
Projects,Areas,Resources,Archives.- In a bookmark manager: Create four main folders/collections.
- In a note-taking app: Create four main notebooks/sections/top-level pages.
- In cloud storage: Create four main folders.
- Populate with Your Definitions: Create sub-folders, tags, or pages within each of these top-level categories, based on the Projects, Areas, and Resources you defined in Step 2.
Projects/Website Redesign 2026Areas/Personal DevelopmentResources/AI Ethics
Step 4: The Migration & Processing Phase (Gradual Approach)
Now for the actual sorting. This can be the most time-consuming part, but it’s crucial. Don’t try to do it all at once.
- Start with Current Work: Begin by moving all information related to your active projects into their respective new “Projects” folders/sections. This immediately gives you a clean workspace for your most important work.
- Address Incoming Information: From this point forward, every new piece of information (bookmark, note, file) should be immediately categorized into P, A, R, or A. This prevents future build-up.
- Process Backlog Incrementally: Don’t feel pressured to sort every single old file or bookmark instantly. Dedicate 15-30 minutes a day or a few hours a week to slowly chipping away at your backlog. Focus on one type of information at a time (e.g., “today I’ll sort my browser bookmarks,” “tomorrow I’ll tackle old desktop files”).
- Move to Archives Liberally: If something is no longer active, move it to Archives. Resist the urge to keep things in active folders “just in case.” The Archive is for “just in case.”
Explore essential browser extensions for streamlined digital organization.
Step 5: The Weekly Review (Crucial for Maintenance)
The PARA method is a dynamic system, not a static one. The Weekly Review, popularized by David Allen’s GTD, is essential for its long-term success.
- Schedule It: Block out 60-90 minutes once a week (e.g., Friday afternoon or Monday morning).
- Review Each Category:
- Projects: What’s the next action? Is it still active? Any new information to add?
- Areas: Are there any new projects arising from an Area? Any standards to update?
- Resources: Any new interests to add? Any resources now relevant to a Project or Area? Any old ones to Archive?
- Archives: Briefly scan. Do any archived items need to be reactivated? (Rare, but possible).
- Process Inboxes: Clear all digital inboxes (email, download folder, unsorted bookmarks, quick notes). Assign everything to P, A, R, or A.
- Reflect and Refine: How is the system working for you? Are your categories still relevant? Make small adjustments as needed.
By following these steps, you’ll not only establish a robust PARA system but also cultivate the habits necessary to maintain it, ensuring your digital environment remains a powerful asset for your productivity and knowledge management.
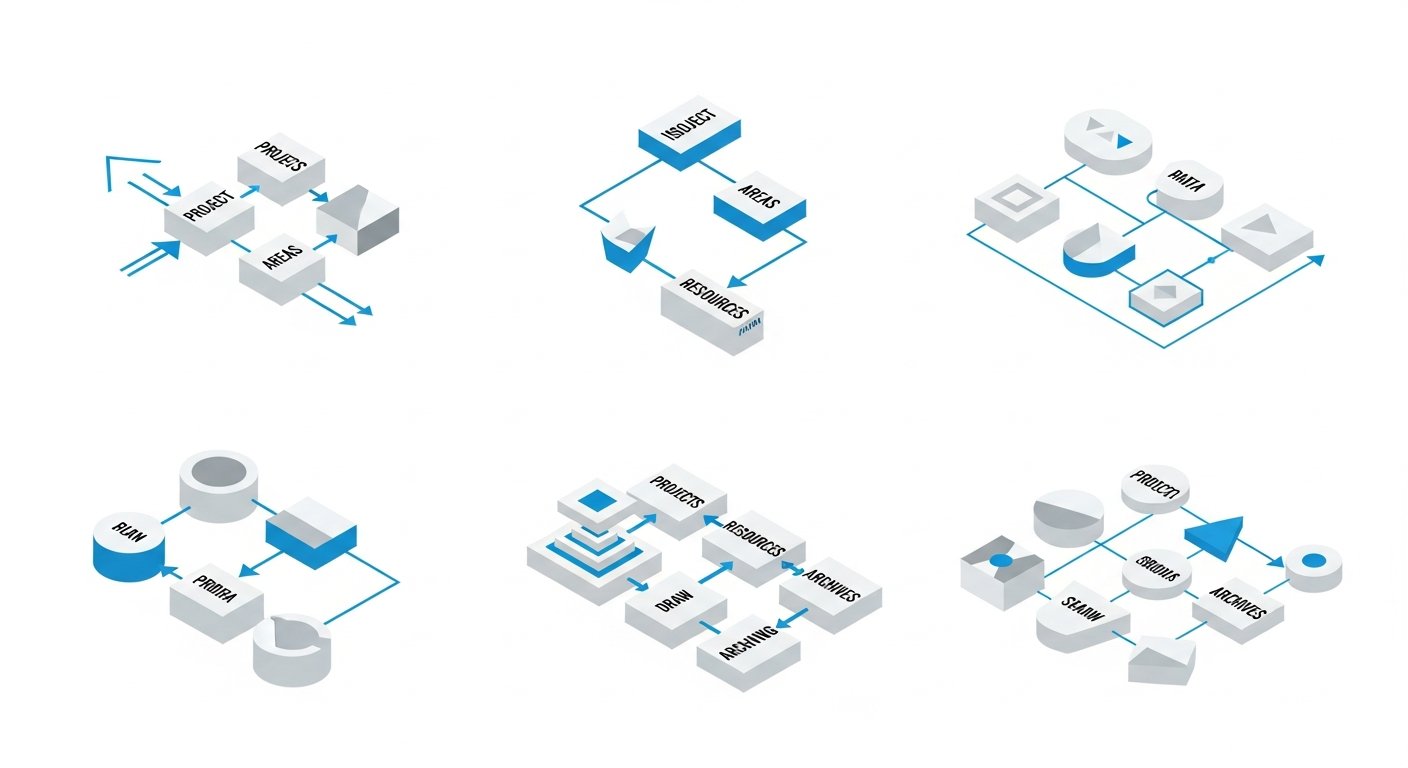
[INLINE IMAGE 2: place after fourth H2 | alt=”para method comparison illustration”]
PARA vs. Other Popular Organization Systems: A Comparative Look
The world of personal productivity and knowledge management is rich with various methodologies. While the PARA method stands out for its universality and action-oriented design, it’s helpful to understand how it compares to other established systems like Getting Things Done (GTD) and Zettelkasten. This comparison will highlight PARA’s unique strengths and how it can complement or serve as an alternative to these approaches.
PARA vs. Getting Things Done (GTD)
David Allen’s Getting Things Done (GTD) is perhaps the most widely recognized productivity methodology. It focuses heavily on capturing everything, clarifying what needs to be done, organizing it into actionable steps, reflecting, and engaging.
- Key Similarities:
- Capture Everything: Both systems advocate for getting all information out of your head and into a trusted system.
- Action-Oriented: Both are designed to help you clarify what needs to be done and take action. GTD’s “Next Actions” are similar to the active nature of PARA’s “Projects.”
- Weekly Review: Essential for maintaining both systems and ensuring clarity and control.
- Key Differences:
- Scope: GTD is primarily a task and workflow management system. While it has “Reference” categories, its core strength is processing actionable items. PARA, conversely, is a universal information organization system that encompasses tasks, but also files, notes, and bookmarks, and extends to non-actionable knowledge (Resources, Archives).
- Structure: GTD uses contexts, projects, and someday/maybe lists. PARA uses Projects, Areas, Resources, and Archives. PARA’s “Areas” are somewhat analogous to GTD’s “Areas of Focus,” but PARA explicitly integrates all information related to these areas, not just tasks.
- Information Depth: PARA offers a more explicit framework for deep knowledge management (Resources) and historical record-keeping (Archives), which are less emphasized as core structural elements in GTD’s primary workflow.
- Complementary Use: Many practitioners find that PARA and GTD are highly complementary. You can use PARA to organize all your digital information (documents, notes, bookmarks) and then use GTD principles to manage the specific tasks that arise from your PARA Projects and Areas. For example, a “Project” in PARA could be a “Project” in GTD, with its “Next Actions” managed by GTD’s context-based lists.
PARA vs. Zettelkasten
The Zettelkasten method, or “slip-box” system, is a personal knowledge management and note-taking technique developed by German sociologist Niklas Luhmann. It emphasizes creating atomic, interconnected notes to facilitate deeper thinking and idea generation.
- Key Similarities:
- Knowledge Synthesis: Both aim to help you manage and leverage your knowledge effectively.
- Long-Term Value: Both are designed for long-term knowledge retention and growth.
- Personal Ownership: Both are highly personal systems tailored to individual needs and interests.
- Key Differences:
- Focus: Zettelkasten is hyper-focused on note-taking, idea generation, and creating a network of interconnected thoughts. It’s about developing arguments and insights over time. PARA is a broader system for organizing all types of information (notes, files, bookmarks, tasks) based on their actionability and relevance.
- Granularity: Zettelkasten emphasizes atomic, single-idea notes. While PARA can organize notes, it doesn’t dictate the internal structure of individual notes to the same degree.
- Action vs. Discovery: PARA is strongly action-oriented (Projects). Zettelkasten is more about serendipitous discovery and building a web of ideas, which might *lead* to projects, but isn’t its primary organizational principle.
- Integration: Zettelkasten often lives in one dedicated tool (like Obsidian or Zettlr). PARA is designed to be tool-agnostic and integrate across a wider array of digital platforms.
- Complementary Use: PARA can provide the overarching structure for your digital life, and your Zettelkasten can exist as a highly specialized “Resource” within your PARA system. For instance, your Zettelkasten could be a folder or a dedicated vault under
Resources/Knowledge Base/My Zettelkasten. This allows you to benefit from the deep idea connections of Zettelkasten while keeping it organized within a broader, actionable framework.
Comparison Table: PARA vs. Other Systems
| Feature / System | PARA Method | Getting Things Done (GTD) | Zettelkasten |
|---|---|---|---|
| Primary Focus | Universal information organization based on actionability (Projects, Areas, Resources, Archives) | Task and workflow management, processing actionable items into “Next Actions” | Idea generation, knowledge synthesis, interconnected notes for deeper thinking |
| Information Types Organized | All digital information: files, notes, bookmarks, tasks, emails | Primarily tasks, projects, reference materials (less emphasis on structure) | Atomic notes, linked ideas, research fragments |
| Core Structure | Projects, Areas, Resources, Archives | Inbox, Projects, Next Actions, Contexts, Someday/Maybe, Reference | Individual “zettels” (notes) with unique IDs, linked by keywords and content |
| Action-Oriented? | Highly (especially Projects & Areas) | Highly (core to the system) | Indirectly; leads to action through idea synthesis, but not a primary driver |
| Best for… | Overarching digital organization, reducing digital clutter, cohesive PKM across tools | Managing tasks, commitments, and ensuring nothing falls through the cracks | Deep learning, research, writing, generating novel ideas, academic work |
| Universality Across Tools | Highly adaptable to any digital tool | Applicable to various task managers, but core structure less universal for non-tasks | Often tied to specific note-taking apps that support linking (e.g., Obsidian) |
Ultimately, the “best” system depends on your individual needs and workflow. PARA offers a strong, fundamental layer of organization for all your digital assets, making it
Unlock Peak Productivity with the PARA Method: Your Guide to Digital Organization and Knowledge Management
Affiliate disclosure: This article may contain affiliate links. Recommendations are independent and editorially driven.
In an increasingly digital world, the sheer volume of information we encounter daily can feel overwhelming. From countless browser tabs and saved articles to an ever-growing list of tasks and projects, managing our digital lives effectively is no longer a luxury—it’s a necessity. This is especially true for anyone serious about personal knowledge management (PKM), productivity, and efficient link curation.
Enter the PARA method, a revolutionary organizational system developed by productivity expert Tiago Forte. PARA stands for Projects, Areas, Resources, and Archives, and it provides a universal framework for organizing any kind of information, across any platform. Whether you’re managing bookmarks, taking notes, organizing files, or planning your next big project, PARA offers a clear, consistent structure that reduces mental clutter and enhances focus.
For users of bookmark managers, note-taking apps, browser extensions, and other PKM tools, the PARA method isn’t just another organizational fad; it’s a foundational strategy that can transform how you interact with and leverage your digital knowledge. This comprehensive guide will deep-dive into the PARA method, exploring its components, benefits, implementation strategies, and how it integrates seamlessly with your favorite digital tools to elevate your productivity and knowledge management to new heights.
What is the PARA Method? A Universal System for Digital Organization
At its core, the PARA method is a simple yet powerful system for organizing all the information in your life. It’s designed to be universal, meaning it applies consistently whether you’re organizing files on your computer, notes in a digital notebook, tasks in a project manager, or links in a bookmarking tool. The beauty of PARA lies in its four straightforward categories, each serving a distinct purpose:
- P – Projects: A series of tasks linked to a goal, with a deadline.
- A – Areas: A sphere of activity with a standard to be maintained over time.
- R – Resources: A topic or theme of ongoing interest.
- A – Archives: Inactive items from Projects, Areas, or Resources.
This structure provides clarity on where every piece of information should reside, reducing the friction of decision-making and ensuring that your digital environment supports, rather than hinders, your work and life goals. By understanding the purpose of each category, you can confidently sort, retrieve, and act upon your information.
The Foundational Principles of PARA
The PARA method isn’t just about creating folders; it’s about a dynamic flow of information that mirrors how you work and learn. It’s designed to be action-oriented, ensuring that your knowledge is not merely stored but actively leveraged. Here are some of its foundational principles:
- Actionability: Information is categorized based on its immediate relevance to your current goals and responsibilities. Projects are where action happens.
- Context: Each item has a clear home, providing context for its existence and purpose. This prevents information from becoming an isolated data point.
- Flexibility: The system is robust enough to handle any type of information (text, links, images, documents) and adaptable to any digital tool.
- Simplicity: Despite its power, the four categories are easy to remember and apply, reducing cognitive load when organizing.
- Flow: Information is expected to move between categories over time. A Resource might become relevant to a Project, or a finished Project might be moved to Archives.
[INLINE IMAGE 1: place after second H2 | alt=”para method concept illustration”]
Why Implement the PARA Method? Benefits for Productivity and Knowledge Management
Adopting the PARA method is more than just organizing your files; it’s a strategic move that can dramatically enhance your productivity, reduce stress, and transform your relationship with information. For anyone deeply invested in tech productivity and effective knowledge management, the benefits are profound and far-reaching.
Clarity and Focus in a World of Digital Noise
One of the most immediate benefits of PARA is the unparalleled clarity it brings to your digital life. Instead of a sprawling mess of unfiled documents, random notes, and unsorted bookmarks, you gain a structured, predictable system. This clarity translates directly into:
- Reduced Cognitive Load: You spend less mental energy trying to remember where something is or what it relates to. Each piece of information has a “home,” making retrieval effortless.
- Enhanced Decision-Making: With clear categories for Projects and Areas, it becomes easier to decide what to work on next, what information is most relevant, and where new information should be stored. This prevents analysis paralysis.
- Improved Focus: By segmenting your digital space, you can dedicate specific environments to specific types of work. When you’re in your “Projects” section, you’re in execution mode. When you’re in “Resources,” you’re in learning/curation mode. This focused environment minimizes distractions.
Efficient Information Retrieval and Application
The true power of knowledge lies not just in its acquisition but in its ability to be recalled and applied when needed. PARA excels at this:
- Rapid Retrieval: Whether you need a specific file for a project, a note related to an ongoing area of responsibility, or a resource for future learning, the logical structure of PARA allows you to find it quickly. This saves invaluable time that would otherwise be lost to searching.
- Actionable Knowledge: By linking information directly to Projects and Areas, PARA ensures that your saved knowledge isn’t just theoretical; it’s primed for action. Bookmarks saved for a “Project: Marketing Strategy” are immediately relevant and ready to be used.
- Seamless Integration Across Tools: The universal nature of PARA means you can apply the same organizational logic to your bookmark manager, note-taking app, file storage, and task list. This creates a cohesive digital ecosystem where information flows smoothly between different tools, rather than being siloed.
Reduced Stress and Digital Overwhelm
The feeling of being overwhelmed by digital clutter is a common modern ailment. PARA offers a powerful antidote:
- Systematic Decluttering: The “Archives” category provides a guilt-free space for finished projects and less active resources. You don’t delete information; you simply move it out of your active workspace, knowing it’s there if you ever need it. This prevents digital hoarding.
- Clear Boundaries: PARA helps differentiate between “active work” (Projects), “ongoing responsibilities” (Areas), and “potential future interest” (Resources). This distinction reduces the mental burden of feeling like everything is equally urgent or important.
- Empowerment Over Your Digital Life: By implementing PARA, you take control of your information, rather than being controlled by it. This sense of mastery over your digital environment is incredibly empowering and reduces anxiety related to lost files or forgotten tasks.
In essence, the PARA method provides a robust framework that empowers you to not only manage information but to truly leverage it for greater productivity, learning, and peace of mind. It transforms your digital chaos into a structured, responsive knowledge base.
The Pillars of PARA: Understanding Each Component in Detail
To effectively harness the power of the PARA method, it’s essential to understand each of its four components deeply. Each category serves a unique purpose and plays a critical role in the overall system, guiding where your digital assets – from bookmarks and notes to files and tasks – should reside.
Projects: The Heartbeat of Action and Progress
Definition: A Project is a series of tasks, linked to a specific goal, with a deadline. Projects are the “active ingredient” in the PARA method; they represent the things you are actively working on right now. They have a clear start and a clear end.
- Key Characteristics:
- Action-Oriented: Projects demand action and have clear next steps.
- Time-Bound: There’s usually a specific completion date or timeframe.
- Outcome-Driven: Projects aim to achieve a tangible result or outcome.
- Temporary: Once completed, a project either moves to Archives or transforms into a new project/area.
- Examples for bookmarksharer users:
- “Launch New Website Feature (Q3 2026)”
- “Research Competitor Analysis Tools” (Goal: Select a tool by month’s end)
- “Curate Links for ‘Future of AI’ Presentation”
- “Write Blog Post: ‘Top 10 Productivity Hacks 2026′”
- “Plan Summer Vacation 2026”
- What goes here: All information directly related to achieving a project’s goal. This includes project plans, research notes, meeting minutes, relevant bookmarks, drafts, asset files, and communication logs. In a bookmark manager, this might be a specific collection or tag for “Website Feature Launch Links.”
Areas: Spheres of Ongoing Responsibility and Maintenance
Definition: An Area of Responsibility is a sphere of activity with a standard to be maintained over time. Unlike Projects, Areas are ongoing and generally don’t have a specific end date. They represent aspects of your life or work that require continuous attention and maintenance.
- Key Characteristics:
- Ongoing: Areas are never “finished”; they require continuous engagement.
- Standard-Driven: There’s an expectation of maintaining a certain level or quality within this area.
- Passive (often): While projects are active, areas are more about managing a domain. Tasks may arise from an Area, forming a new Project.
- Permanent: Areas typically persist over long periods.
- Examples for bookmarksharer users:
- “Personal Development” (e.g., learning new skills, reading books, self-improvement)
- “Health & Fitness” (e.g., workout plans, diet research, medical records)
- “Finances” (e.g., budgeting, investments, tax documents)
- “Professional Growth” (e.g., industry news, certification tracking, skill development)
- “Website Maintenance” (e.g., backups, security updates, performance monitoring)
- “Family Life” (e.g., family calendar, kids’ activities, home management)
- What goes here: Reference materials, long-term plans, policies, standards, templates, and general knowledge related to that area. For bookmarksharer, this could be a “Professional Growth: Industry Trends” collection, or tags like “Health_Nutrition_Recipes.”
Resources: Your Repository of Interests and Potential
Definition: A Resource is a topic or theme of ongoing interest. Resources are anything that captures your attention or curiosity, but isn’t directly tied to an active project or an ongoing area of responsibility right now. They are potential fuel for future projects or knowledge that enriches your understanding.
- Key Characteristics:
- Topical: Organized by subject matter, themes, or interests.
- Exploratory: Information gathered out of curiosity or for potential future use.
- No Deadline: There’s no immediate pressure to act on this information.
- Cross-cutting: A resource might eventually inform multiple projects or areas.
- Examples for bookmarksharer users:
- “AI Ethics & Future Trends” (Saved articles, research papers, thought pieces)
- “Web Design Best Practices” (Tutorials, inspiring portfolios, CSS tips)
- “Digital Marketing Strategies” (e-books, blog posts, case studies)
- “Sustainable Living Ideas” (DIY guides, product reviews, research)
- “Cooking Recipes & Techniques”
- “Interesting Quotes and Ideas”
- What goes here: Any information you want to keep for future reference or learning, organized by topic. This is where bookmarking tools truly shine. You might have folders or tags like “AI_Trends,” “Design_Inspiration,” or “Cooking_Vegan.” These are often where new Projects or insights originate.
Archives: Your Digital History and Cold Storage
Definition: An Archive is for inactive items from Projects, Areas, or Resources. Once a project is completed, an area becomes inactive (e.g., a past job), or a resource is no longer a current interest, it moves to the Archive. This acts as a historical record and a decluttering mechanism for your active spaces.
- Key Characteristics:
- Inactive: Items are no longer being actively worked on or maintained.
- Historical Record: Provides a reference for past work, decisions, or interests.
- Storage Only: No expectation of immediate action or retrieval.
- Permanent (usually): Information is retained indefinitely, unless explicitly deleted.
- Examples for bookmarksharer users:
- “Archived Project: Old Website Redesign 2024” (All related files, notes, bookmarks)
- “Archived Area: Old Job Role” (Related documents, professional development notes)
- “Archived Resource: Outdated Technology Trends” (Articles, tutorials that are no longer relevant)
- “Completed Course Materials: Online Marketing 101”
- What goes here: Everything that has run its course but you might need to reference in the future. The Archive ensures that your active Projects, Areas, and Resources remain lean and focused, while providing a safety net for valuable historical data. In your bookmark manager, this might be an “Archives” folder with subfolders for old projects or categories.
Understanding these four components and their dynamic relationship is the key to mastering the PARA method. They provide a robust framework that brings order to the complex world of digital information.
Implementing PARA Across Your Digital Toolkit
The true genius of the PARA method lies in its universality. It’s not tied to a specific app or platform, but rather provides a mental model that you can apply consistently across all your digital tools. This is particularly powerful for users of bookmark managers, note-taking apps, and other PKM tools who often juggle information across multiple platforms.
Bookmark Managers & Link Curation: Organizing Your Web Knowledge
For bookmarksharer users, applying PARA to your link curation workflow is a game-changer. Instead of a messy collection of uncategorized links or a rigid folder structure that quickly becomes obsolete, PARA offers a dynamic and actionable system.
- Projects (Bookmarks): Create specific collections, tags, or folders for each active project. For example, a collection named “Project: Website UI Redesign” would house all articles on modern UI trends, competitor analyses, and design inspiration relevant to that specific project. Once the project is complete, move this collection to your “Archives” section.
- Areas (Bookmarks): Use tags or collections for your ongoing responsibilities. Examples: “Area: Personal Finance” might contain links to budgeting tools, investment articles, and tax resources. “Area: Professional Development” could hold links to courses, industry reports, and career advice. These are continually updated and maintained.
- Resources (Bookmarks): This is where the bulk of your curated links might reside. Create broad categories for your interests: “Resource: AI & Machine Learning,” “Resource: Productivity Hacks,” “Resource: Healthy Recipes.” These are topics you’re curious about and want to learn more about, potentially feeding future projects or simply expanding your knowledge base. Many bookmark managers allow robust tagging, which is ideal here for cross-referencing.
- Archives (Bookmarks): Create an “Archives” top-level folder or tag. Within it, move completed project collections (e.g., “Archived Project: Old Marketing Campaign”), inactive Area collections (e.g., “Archived Area: Previous Job Role”), or Resource collections you no longer actively pursue (e.g., “Archived Resource: Flash Development Tutorials”).
Many modern bookmarking tools offer features like nested folders, tags, and collections that perfectly align with the PARA structure. The key is to be consistent with your naming conventions (e.g., always prefix “Project:” or “Area:” to your collections).
Note-Taking Apps: Structuring Your Thoughts and Learning
Tools like Notion, Evernote, Obsidian, and OneNote become far more powerful when organized with PARA. This approach ensures your notes are not just stored but are readily accessible and actionable.
- Notion: Utilize databases for “Projects” (with status, due dates), pages for “Areas,” and dedicated “Resources” databases for articles, books, and insights. A top-level “Archives” page can house old projects/notes.
- Evernote: Create separate notebooks for each Project, Area, and Resource. A “Project: New App Launch Notes” notebook would be active, while “Area: Health Journal” would be ongoing. “Resource: Design Principles” would contain general knowledge. Once a notebook is finished or inactive, move it to an “Archives” stack.
- Obsidian: Leverage folders and tags. Create top-level folders: “Projects,” “Areas,” “Resources,” “Archives.” Within these, create subfolders or use tags to further categorize. For example,
Projects/Blog Post Ideas/2026-05_PARA_ArticleorResources/AI/Latest Research Papers. Links between notes reinforce the interconnectedness. - OneNote: Use Sections or Section Groups for Projects, Areas, and Resources within your notebooks. An “Archives” notebook can hold inactive sections.
The crucial aspect is consistency. Choose your tool, establish your PARA structure, and stick to it. This allows for seamless movement of information between categories as its relevance changes.
File Management & Cloud Storage: Organizing Your Digital Assets
Your local hard drives and cloud storage services (Google Drive, Dropbox, OneDrive, iCloud) are prime candidates for PARA implementation. This brings order to your documents, photos, and media.
- Top-Level Folders: Create the four main folders: “Projects,” “Areas,” “Resources,” “Archives.”
- Within Projects: Each active project gets its own subfolder (e.g.,
Projects/Client X Website Redesign). This folder contains all files related to that project: documents, images, spreadsheets, presentations. - Within Areas: Subfolders for each area of responsibility (e.g.,
Areas/Personal Finance,Areas/Health & Fitness,Areas/Home Management). - Within Resources: Subfolders for topics of interest (e.g.,
Resources/Photography Techniques,Resources/AI Research Papers,Resources/Learning Spanish). - Within Archives: Move completed project folders, inactive area folders, or outdated resource folders here (e.g.,
Archives/Old Projects/Project Y Completed 2025).
This systematic approach ensures that whether you’re looking for a specific invoice, a presentation deck, or a family photo, you know exactly where to find it. The mental overhead of searching is dramatically reduced.
Task Managers: Connecting Actions to Your PARA Structure
While PARA is fundamentally about information organization, it has a direct impact on how you manage your tasks. Many task managers (Todoist, Asana, ClickUp) allow you to create projects, and these can directly map to your PARA “Projects.”
- Projects in Task Managers: Create a project in your task manager for each active “Project” in your PARA system. All tasks for “Project: Website UI Redesign” go into its dedicated project list.
- Areas in Task Managers: For recurring tasks related to an Area (e.g., “Review Finances Weekly” for “Area: Personal Finance”), these can be set up as recurring tasks or within a dedicated “Area” project list in your task manager. Some people prefer to keep Area tasks in a general “Admin” or “Maintenance” project in their task manager, linking them back to the relevant Area in their note-taking system.
- Resources: Resources don’t typically generate direct tasks, but they might inspire a new Project. (e.g., Reading a “Resource: Productivity Hacks” article might lead to a new “Project: Implement Eisenhower Matrix”).
The key is to use your task manager for “what to do,” and your PARA-organized information system for “the information needed to do it.”
Discover more about integrating your bookmark manager with other productivity tools.
Practical Steps to Get Started with the PARA Method
Implementing a new organizational system can seem daunting, but the PARA method is designed for incremental adoption. Here’s a step-by-step guide to help you begin transforming your digital landscape.
Step 1: The Initial Brain Dump and Inventory
Before you can organize, you need to know what you have. This first step is about getting everything out of your head and into a visible, manageable format.
- List Everything: Take a notebook or a simple text document and list every active project you’re working on, every area of responsibility you maintain, every topic you’re interested in, and even old projects/information you’re holding onto. Don’t censor yourself; just get it all down.
- Gather Your Digital Clutter: Open your bookmark manager, your note-taking app, your cloud storage, and your desktop. Take a mental inventory (or even a quick screenshot) of the sheer volume of unsorted items, random folders, and unread articles. This awareness is the first step to change.
Step 2: Define Your Projects, Areas, and Resources
Now, it’s time to apply the PARA definitions to your inventory from Step 1.
- Identify Projects: Look at your list. Which items have a clear goal and a deadline? These are your Projects. Be specific (e.g., “Launch New Product V2.0,” “Complete Annual Performance Review,” “Organize Digital Photo Archive”). Aim for 5-15 active projects at any given time.
- Define Your Areas: Next, identify your ongoing responsibilities. These are the spheres of your life or work that require continuous attention but don’t have an endpoint. Think “Health,” “Finances,” “Professional Development,” “Home,” “Relationships,” “Creative Pursuits.” Keep this list manageable, perhaps 5-12 core areas.
- Categorize Resources: What topics are you interested in? What do you want to learn more about? What information might be useful someday? Group these into broad categories. Examples: “AI & Future Tech,” “Cooking & Nutrition,” “Marketing Strategies,” “Philosophy,” “Travel Destinations.” These are your Resources. Don’t worry about being exhaustive; you’ll add more over time.
- Everything Else is Archive (for now): If an item doesn’t fit into an active Project, a defined Area, or a current Resource topic, it’s a strong candidate for the Archive. Don’t delete it; just acknowledge its inactive status.
Step 3: Choose Your Tools and Establish the Structure
You don’t need new tools to start with PARA; use what you already have. The key is to apply the PARA structure consistently within them.
- Select Your Core Tools: Which bookmark manager, note-taking app, and file storage do you use most often?
- Create Top-Level PARA Categories: In each selected tool, create the four top-level categories:
Projects,Areas,Resources,Archives.- In a bookmark manager: Create four main folders/collections.
- In a note-taking app: Create four main notebooks/sections/top-level pages.
- In cloud storage: Create four main folders.
- Populate with Your Definitions: Create sub-folders, tags, or pages within each of these top-level categories, based on the Projects, Areas, and Resources you defined in Step 2.
Projects/Website Redesign 2026Areas/Personal DevelopmentResources/AI Ethics
Step 4: The Migration & Processing Phase (Gradual Approach)
Now for the actual sorting. This can be the most time-consuming part, but it’s crucial. Don’t try to do it all at once.
- Start with Current Work: Begin by moving all information related to your active projects into their respective new “Projects” folders/sections. This immediately gives you a clean workspace for your most important work.
- Address Incoming Information: From this point forward, every new piece of information (bookmark, note, file) should be immediately categorized into P, A, R, or A. This prevents future build-up.
- Process Backlog Incrementally: Don’t feel pressured to sort every single old file or bookmark instantly. Dedicate 15-30 minutes a day or a few hours a week to slowly chipping away at your backlog. Focus on one type of information at a time (e.g., “today I’ll sort my browser bookmarks,” “tomorrow I’ll tackle old desktop files”).
- Move to Archives Liberally: If something is no longer active, move it to Archives. Resist the urge to keep things in active folders “just in case.” The Archive is for “just in case.”
Explore essential browser extensions for streamlined digital organization.
Step 5: The Weekly Review (Crucial for Maintenance)
The PARA method is a dynamic system, not a static one. The Weekly Review, popularized by David Allen’s GTD, is essential for its long-term success.
- Schedule It: Block out 60-90 minutes once a week (e.g., Friday afternoon or Monday morning).
- Review Each Category:
- Projects: What’s the next action? Is it still active? Any new information to add?
- Areas: Are there any new projects arising from an Area? Any standards to update?
- Resources: Any new interests to add? Any resources now relevant to a Project or Area? Any old ones to Archive?
- Archives: Briefly scan. Do any archived items need to be reactivated? (Rare, but possible).
- Process Inboxes: Clear all digital inboxes (email, download folder, unsorted bookmarks, quick notes). Assign everything to P, A, R, or A.
- Reflect and Refine: How is the system working for you? Are your categories still relevant? Make small adjustments as needed.
By following these steps, you’ll not only establish a robust PARA system but also cultivate the habits necessary to maintain it, ensuring your digital environment remains a powerful asset for your productivity and knowledge management.
[INLINE IMAGE 2: place after fourth H2 | alt=”para method comparison illustration”]
PARA vs. Other Popular Organization Systems: A Comparative Look
The world of personal productivity and knowledge management is rich with various methodologies. While the PARA method stands out for its universality and action-oriented design, it’s helpful to understand how it compares to other established systems like Getting Things Done (GTD) and Zettelkasten. This comparison will highlight PARA’s unique strengths and how it can complement or serve as an alternative to these approaches.
PARA vs. Getting Things Done (GTD)
David Allen’s Getting Things Done (GTD) is perhaps the most widely recognized productivity methodology. It focuses heavily on capturing everything, clarifying what needs to be done, organizing it into actionable steps, reflecting, and engaging.
- Key Similarities:
- Capture Everything: Both systems advocate for getting all information out of your head and into a trusted system.
- Action-Oriented: Both are designed to help you clarify what needs to be done and take action. GTD’s “Next Actions” are similar to the active nature of PARA’s “Projects.”
- Weekly Review: Essential for maintaining both systems and ensuring clarity and control.
- Key Differences:
- Scope: GTD is primarily a task and workflow management system. While it has “Reference” categories, its core strength is processing actionable items. PARA, conversely, is a universal information organization system that encompasses tasks, but also files, notes, and bookmarks, and extends to non-actionable knowledge (Resources, Archives).
- Structure: GTD uses contexts, projects, and someday/maybe lists. PARA uses Projects, Areas, Resources, and Archives. PARA’s “Areas” are somewhat analogous to GTD’s “Areas of Focus,” but PARA explicitly integrates all information related to these areas, not just tasks.
- Information Depth: PARA offers a more explicit framework for deep knowledge management (Resources) and historical record-keeping (Archives), which are less emphasized as core structural elements in GTD’s primary workflow.
- Complementary Use: Many practitioners find that PARA and GTD are highly complementary. You can use PARA to organize all your digital information (documents, notes, bookmarks) and then use GTD principles to manage the specific tasks that arise from your PARA Projects and Areas. For example, a “Project” in PARA could be a “Project” in GTD, with its “Next Actions” managed by GTD’s context-based lists.
PARA vs. Zettelkasten
The Zettelkasten method, or “slip-box” system, is a personal knowledge management and note-taking technique developed by German sociologist Niklas Luhmann. It emphasizes creating atomic, interconnected notes to facilitate deeper thinking and idea generation.
- Key Similarities:
- Knowledge Synthesis: Both aim to help you manage and leverage your knowledge effectively.
- Long-Term Value: Both are designed for long-term knowledge retention and growth.
- Personal Ownership: Both are highly personal systems tailored to individual needs and interests.
- Key Differences:
- Focus: Zettelkasten is hyper-focused on note-taking, idea generation, and creating a network of interconnected thoughts. It’s about developing arguments and insights over time. PARA is a broader system for organizing all types of information (notes, files, bookmarks, tasks) based on their actionability and relevance.
- Granularity: Zettelkasten emphasizes atomic, single-idea notes. While PARA can organize notes, it doesn’t dictate the internal structure of individual notes to the same degree.
- Action vs. Discovery: PARA is strongly action-oriented (Projects). Zettelkasten is more about serendipitous discovery and building a web of ideas, which might *lead* to projects, but isn’t its primary organizational principle.
- Integration: Zettelkasten often lives in one dedicated tool (like Obsidian or Zettlr). PARA is designed to be tool-agnostic and integrate across a wider array of digital platforms.
- Complementary Use: PARA can provide the overarching structure for your digital life, and your Zettelkasten can exist as a highly specialized “Resource” within your PARA system. For instance, your Zettelkasten could be a folder or a dedicated vault under
Resources/Knowledge Base/My Zettelkasten. This allows you to benefit from the deep idea connections of Zettelkasten while keeping it organized within a broader, actionable framework.
Comparison Table: PARA vs. Other Systems
| Feature / System | PARA Method | Getting Things Done (GTD) | Zettelkasten |
|---|---|---|---|
| Primary Focus | Universal information organization based on actionability (Projects, Areas, Resources, Archives) | Task and workflow management, processing actionable items into “Next Actions” | Idea generation, knowledge synthesis, interconnected notes for deeper thinking |
| Information Types Organized | All digital information: files, notes, bookmarks, tasks, emails | Primarily tasks, projects, reference materials (less emphasis on structure) | Atomic notes, linked ideas, research fragments |
| Core Structure | Projects, Areas, Resources, Archives | Inbox, Projects, Next Actions, Contexts, Someday/Maybe, Reference | Individual “zettels” (notes) with unique IDs, linked by keywords and content |
| Action-Oriented? | Highly (especially Projects & Areas) | Highly (core to the system) | Indirectly; leads to action through idea synthesis, but not a primary driver |
| Best for… | Overarching digital organization, reducing digital clutter, cohesive PKM across tools | Managing tasks, commitments, and ensuring nothing falls through the cracks | Deep learning, research, writing, generating novel ideas, academic work |
| Universality Across Tools | Highly adaptable to any digital tool | Applicable to various task managers, but core structure less universal for non-tasks | Often tied to specific note-taking apps that support linking (e.g., Obsidian) |
Ultimately, the “best” system depends on your individual needs and workflow. PARA offers a strong, fundamental layer of organization for all your digital assets, making it